Tables
The Tables module manages physical dining tables, live occupancy, QR codes for guest ordering, and POS sales tied to each table. It includes three parts: Areas, Tables, and QR Codes.
Areas
Areas group tables into physical zones such as Rooftop, North Corner, or VIP Section. This helps manage large floor plans and organize the table layout.
Area List
- SL — Serial number for each area.
- Name — The area name (e.g., "Rooftop", "North Corner").
- Tables — Total number of tables assigned to that area.
- Action — Edit or delete the area.
Filters & Tools
- Search areas by name.
- Set per-page display to 10, 25, 50, or 100.
- Export the list as PDF, CSV, or Excel.
- Select multiple areas via checkbox for bulk delete.
Add Area — Click "Add Area" to open a modal. Enter the area Name and click Save. Click Reset to clear the input.
Edit Area — Click the pencil icon to open a modal. Update the area name and click Save, or click Cancel to close without saving.
Delete — Click the trash icon to remove an area permanently.
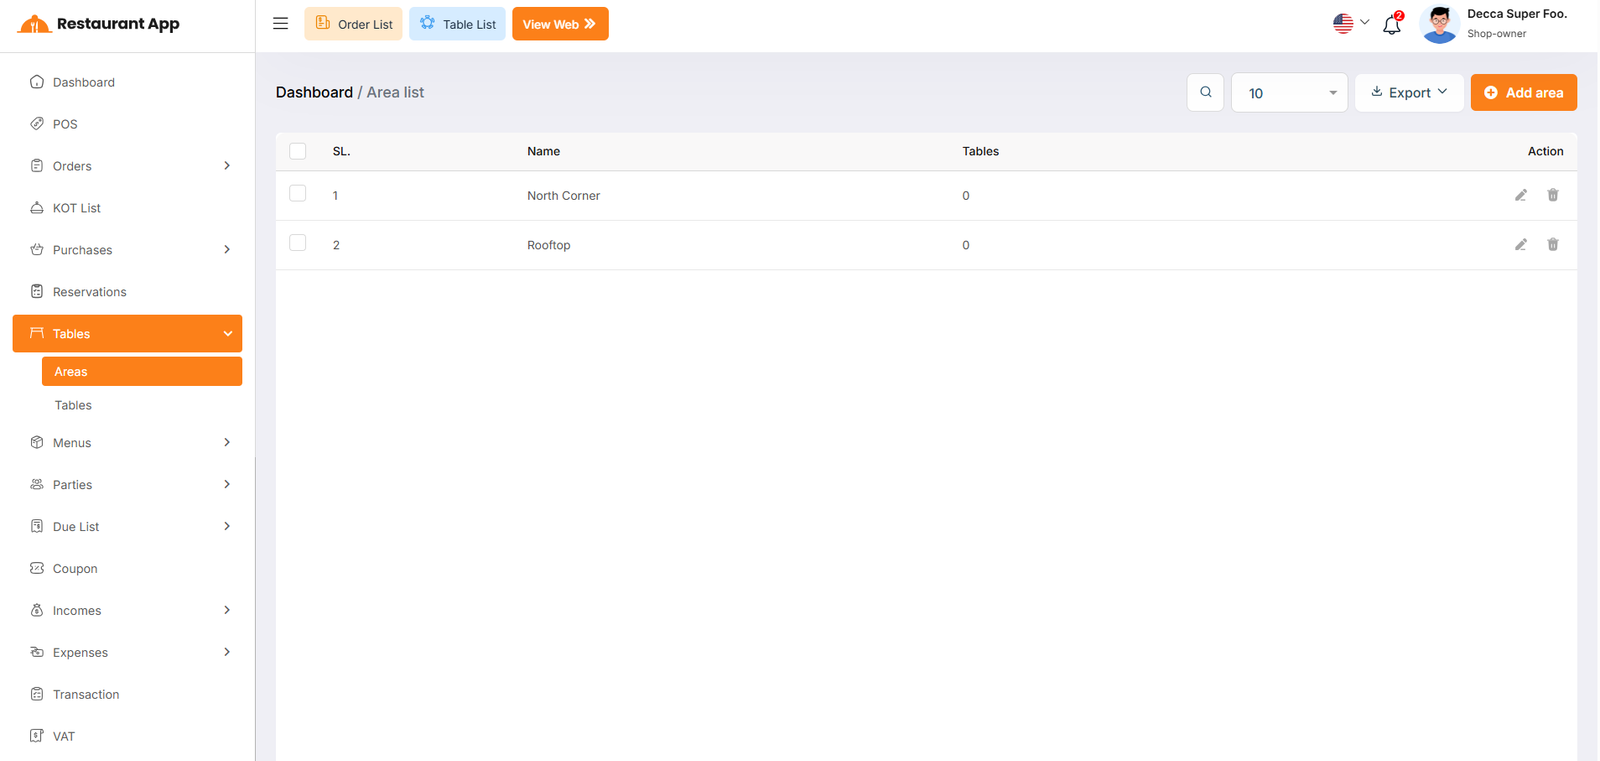
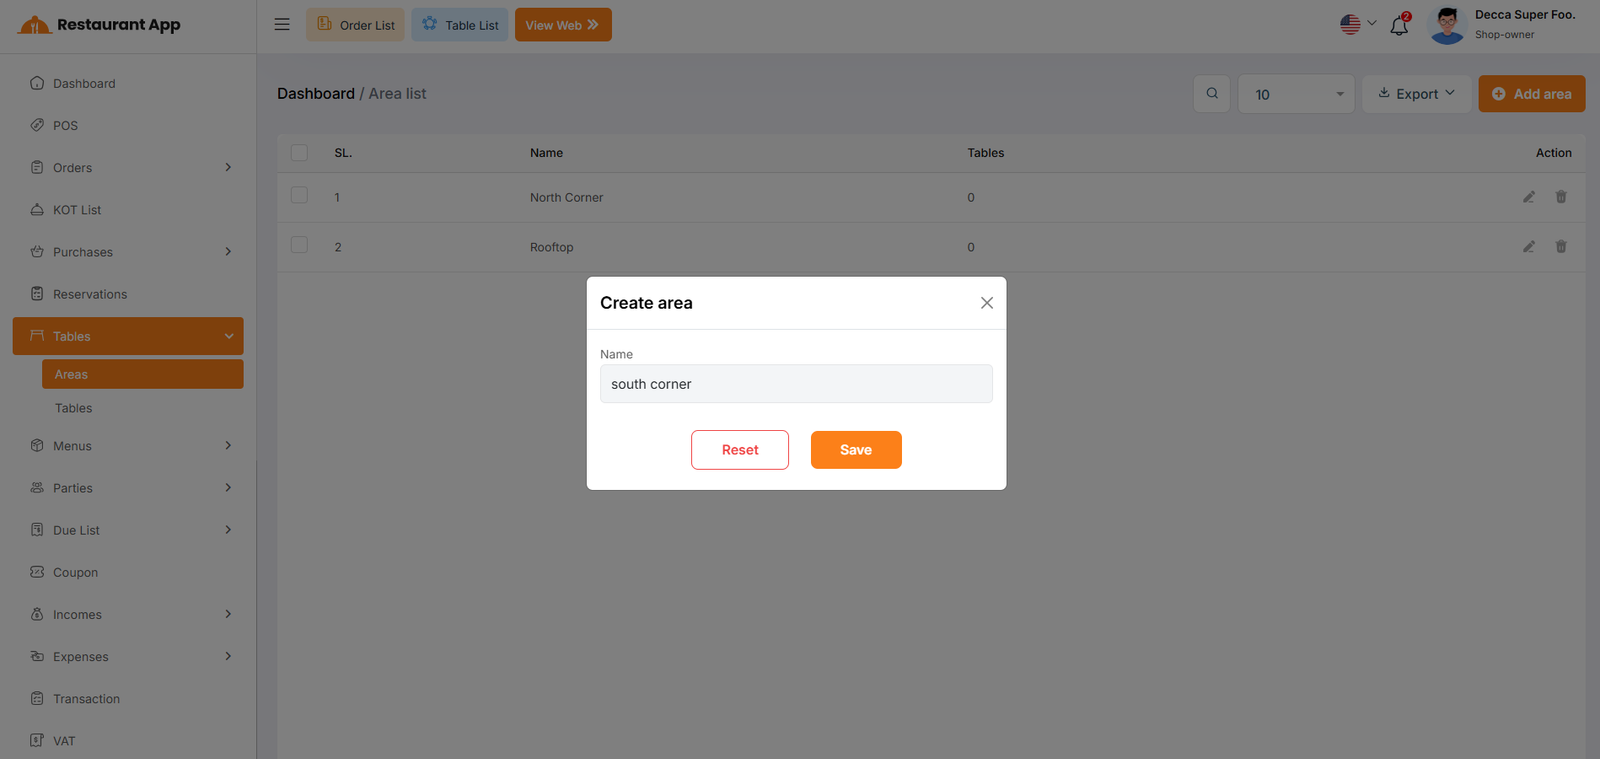
Table List
The Table List page displays every table as a visual card. Each card shows the table name, capacity, real-time status, number of ordered items, elapsed time, and current sale amount.
Status Types
- Available — The table is free and ready for guests.
- KOT — A kitchen order ticket is active and the order is being prepared.
- Occupied — The table has an active sale in progress.
Open a Sale — Click any table card (except the action icons or checkbox) to open the table sale page. This loads the POS interface for that table where you can add items, update status, and process payment.
Filters & Tools
- Search by table name or capacity.
- Filter by status: Booked or Available.
- Click area tabs to filter by dining zone.
- Set per-page display to 20, 50, or 100.
- Export the list as PDF, CSV, or Excel.
- Select multiple tables via checkbox for bulk delete.
Card Actions
- Edit (pencil icon) — Opens a modal to update name, capacity, area, and booking status.
- Delete — Removes the table permanently.
Add Table — Click "Add Table" to open a modal. Enter the table Name, Capacity, and select an Area, then click Save.
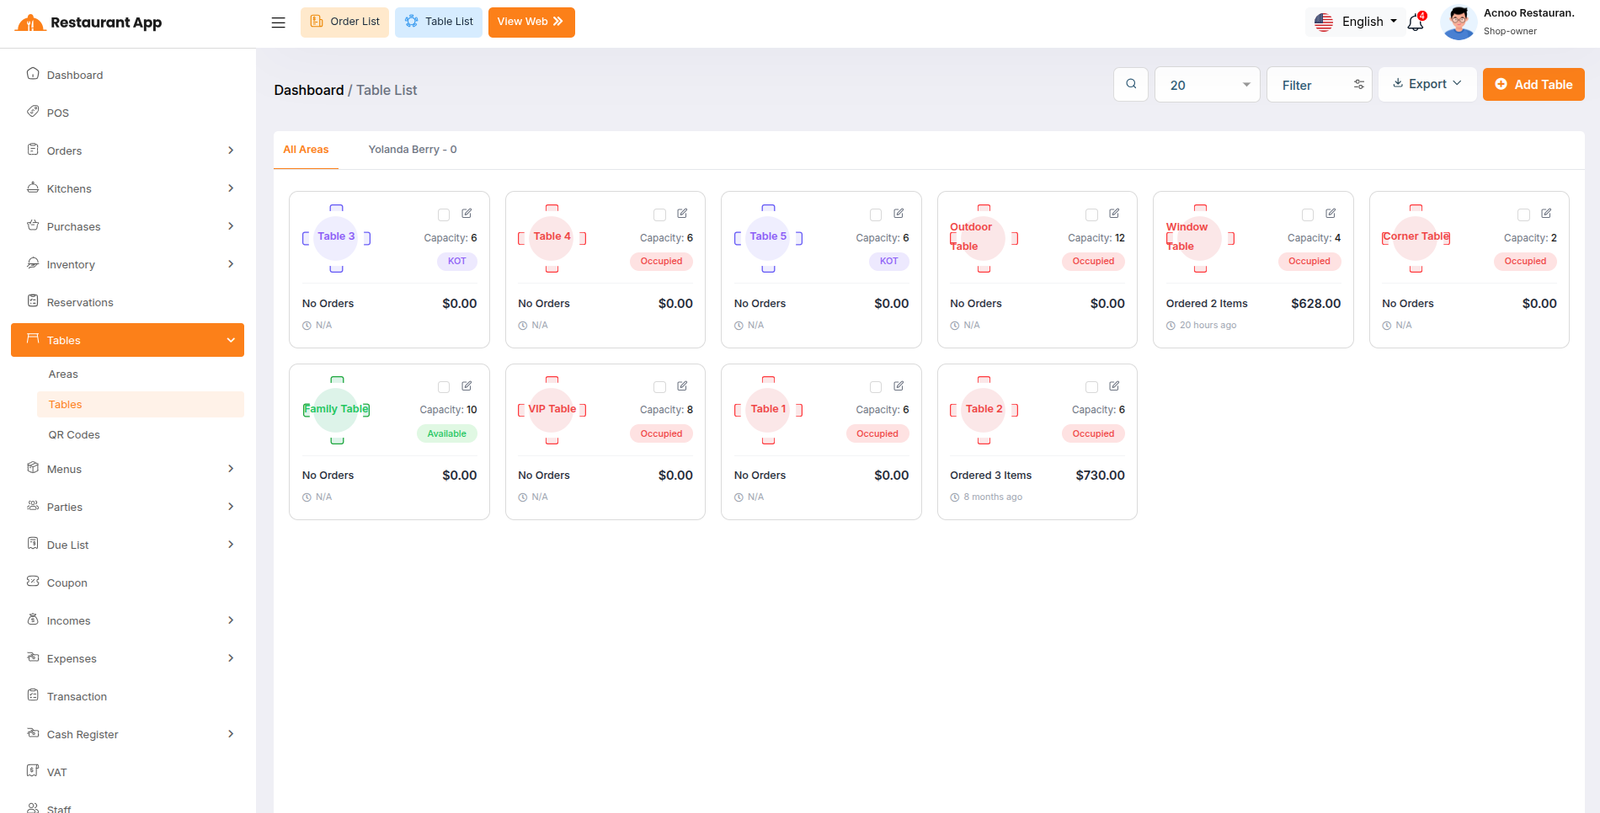
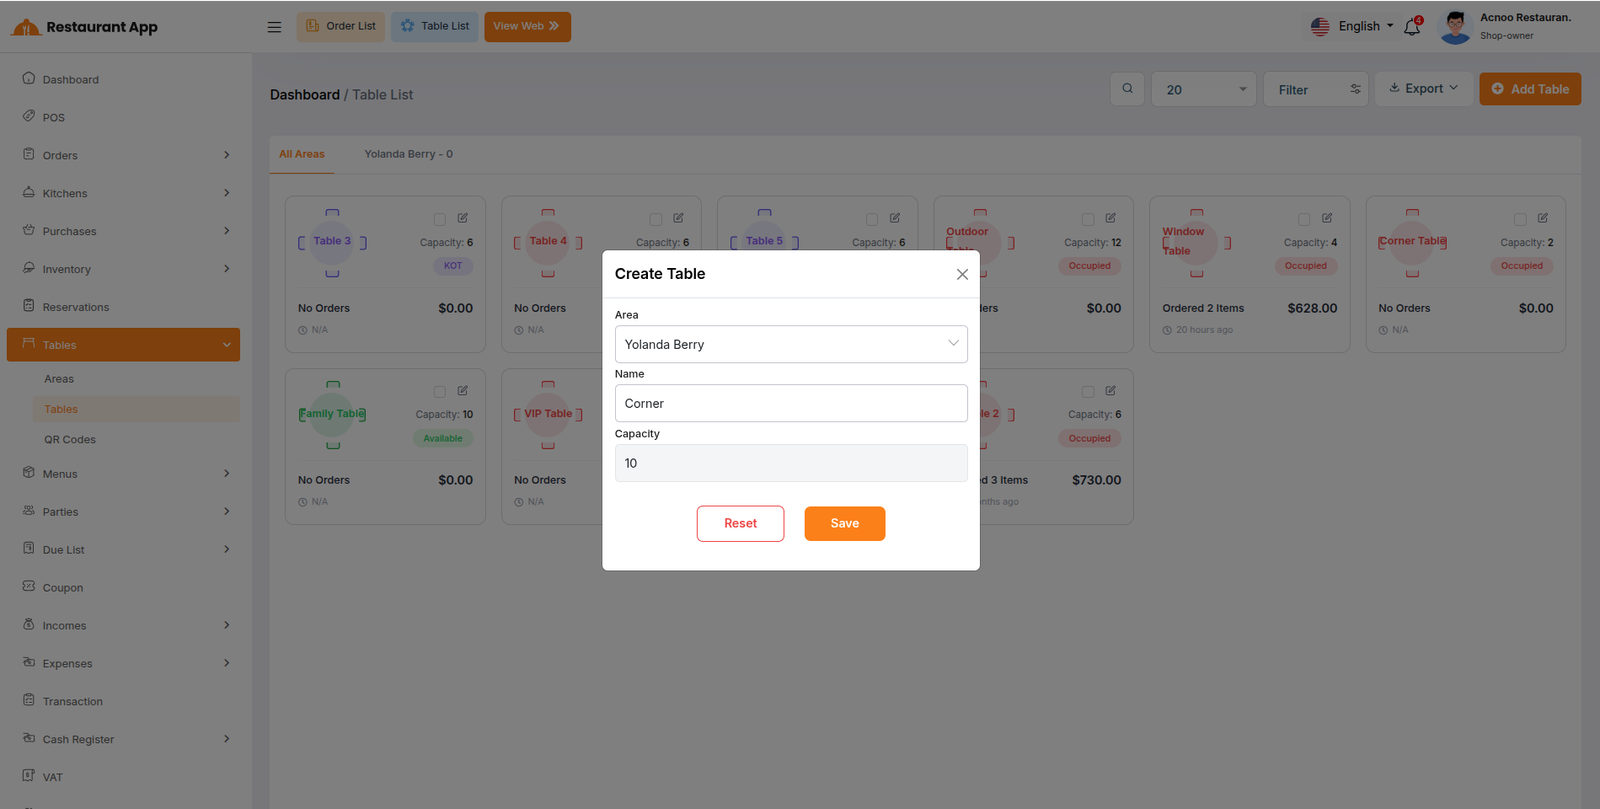
Table Sale (POS)
When you click a table, the system opens the table sale page. This is the point-of-sale interface for managing orders tied to that table.
Order Header
- Order ID and elapsed time since the order started.
- Status Stepper — Visual progress bar showing stages such as Pending, Preparing, Ready, Served, and Completed. Click "Move To [Next Status]" to advance the order.
Table & Guest Info
- Table Name — Displays the current table. A "Table Move" button lets you transfer the active order to another table instantly.
- Waiter — Select a staff member from the dropdown.
- Customer — Choose an existing customer or add a new one via the plus icon.
Adding Items
- Use the search box to find products by name.
- Click a category button in the horizontal carousel to filter products.
- Click any product card to add it to the cart. If the product has variations, a modal will appear to choose options.
- Click the plus (+) button next to the search box to create a new product on the fly.
Cart & Payment
- The cart table lists Item Name, Qty, Unit Price, Amount, and an Action column to remove items.
- Payment Type — Choose from configured payment methods.
- Receive Amount — Enter cash received; the system auto-calculates Change Amount and Due Amount.
- VAT — Applied automatically if configured.
- Coupon — Click the coupon label to apply a discount code.
- Cashback — Auto-calculated loyalty cashback if enabled.
- Discount — Enter a manual discount amount or percentage.
- Tips — Add a tip value.
Click "Update" to save all changes to the sale.
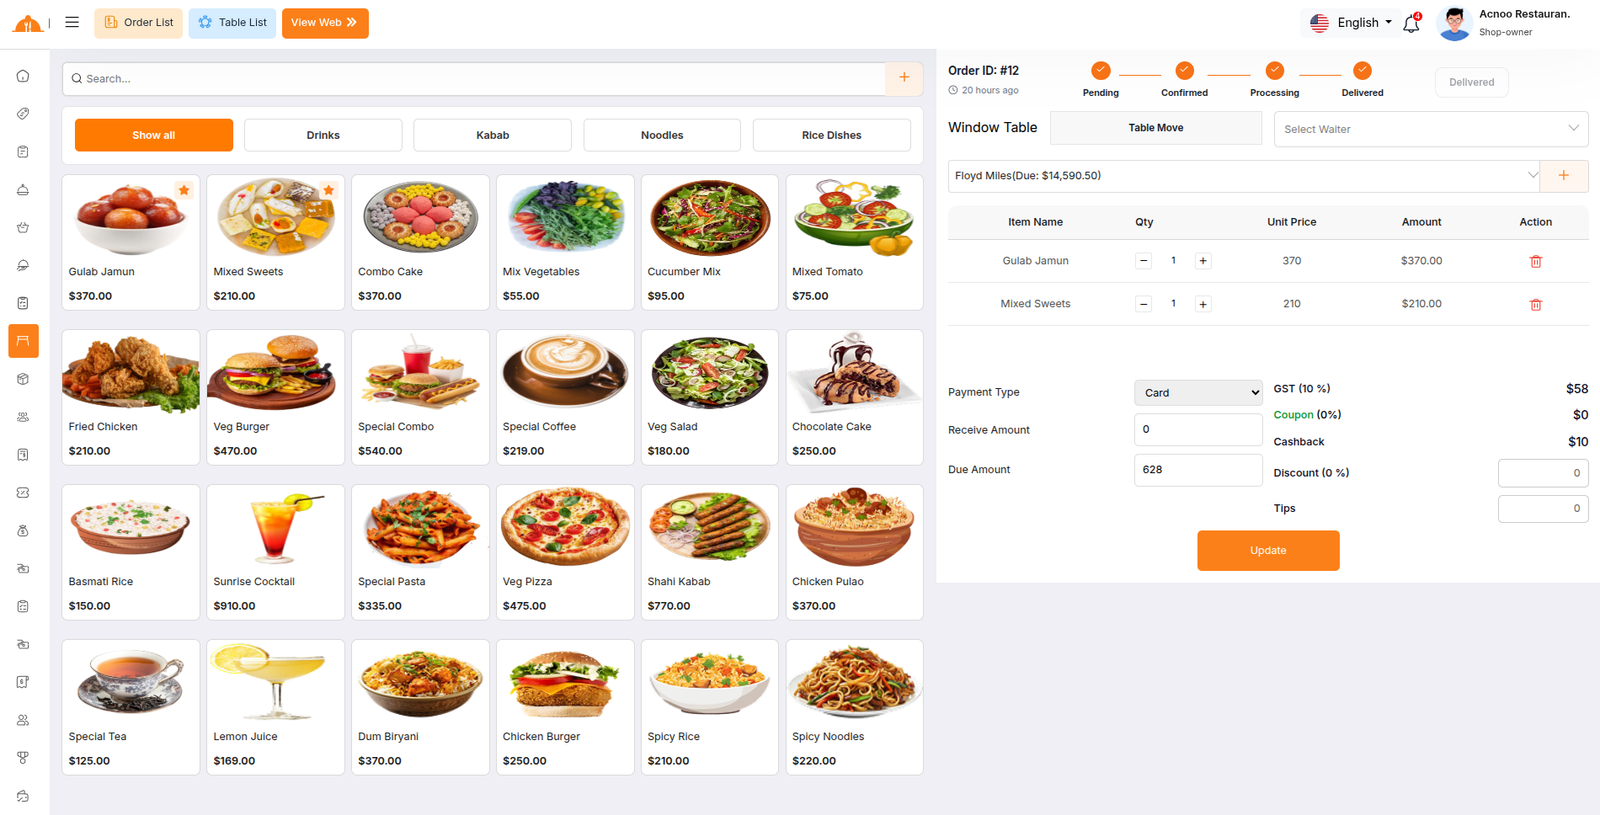
Table Move
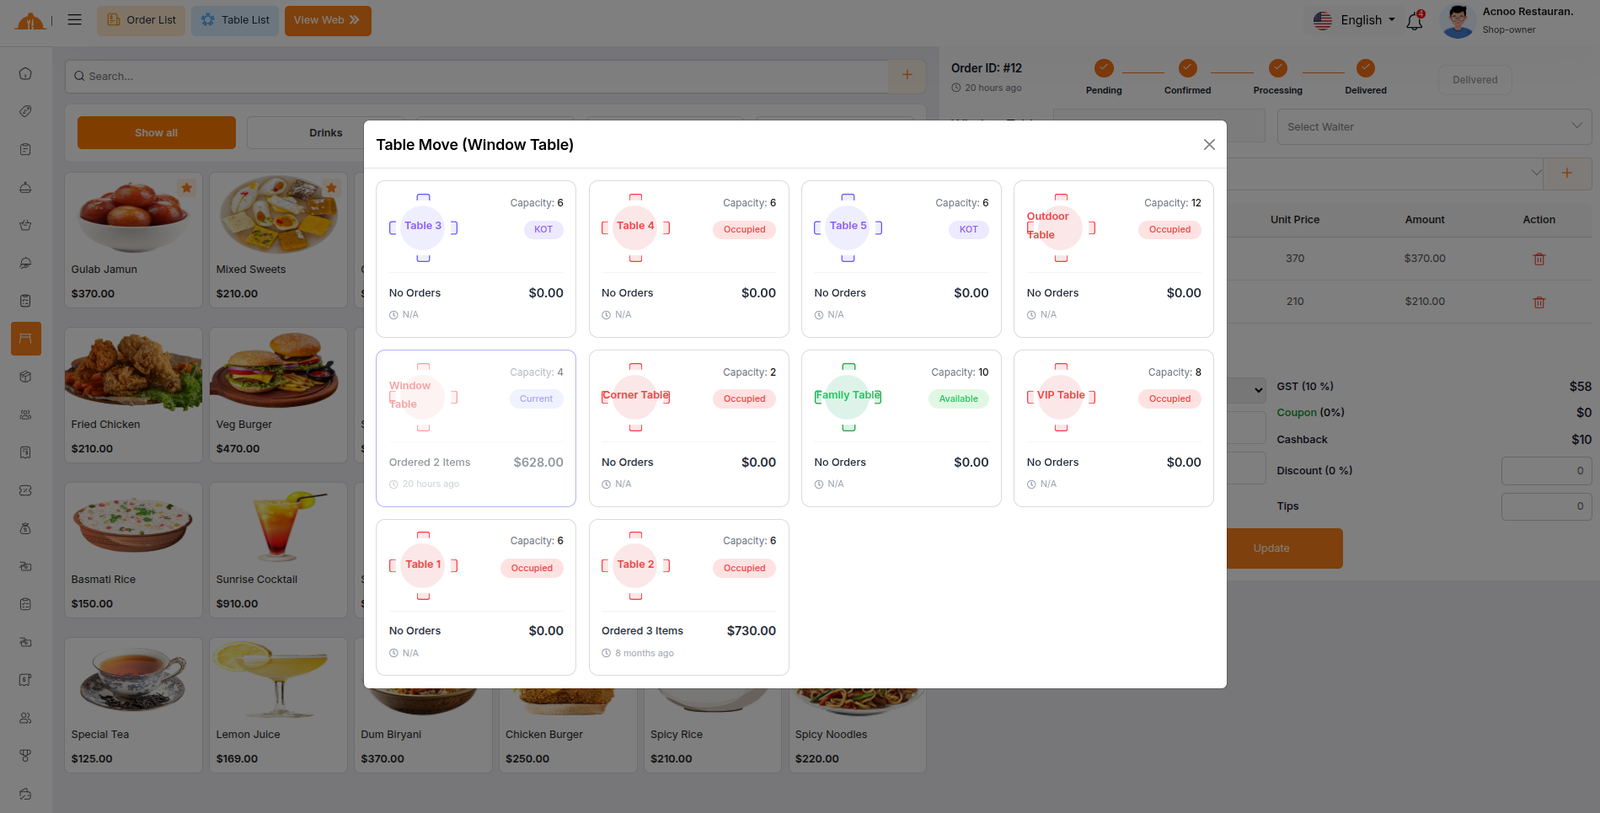
Inside the sale page, click "Table Move" next to the table name. A modal opens showing all tables in the same card layout. The current table is marked "Current" and cannot be selected. Click any other table to move the entire active order there. The page refreshes automatically with the new table name.
QR Codes
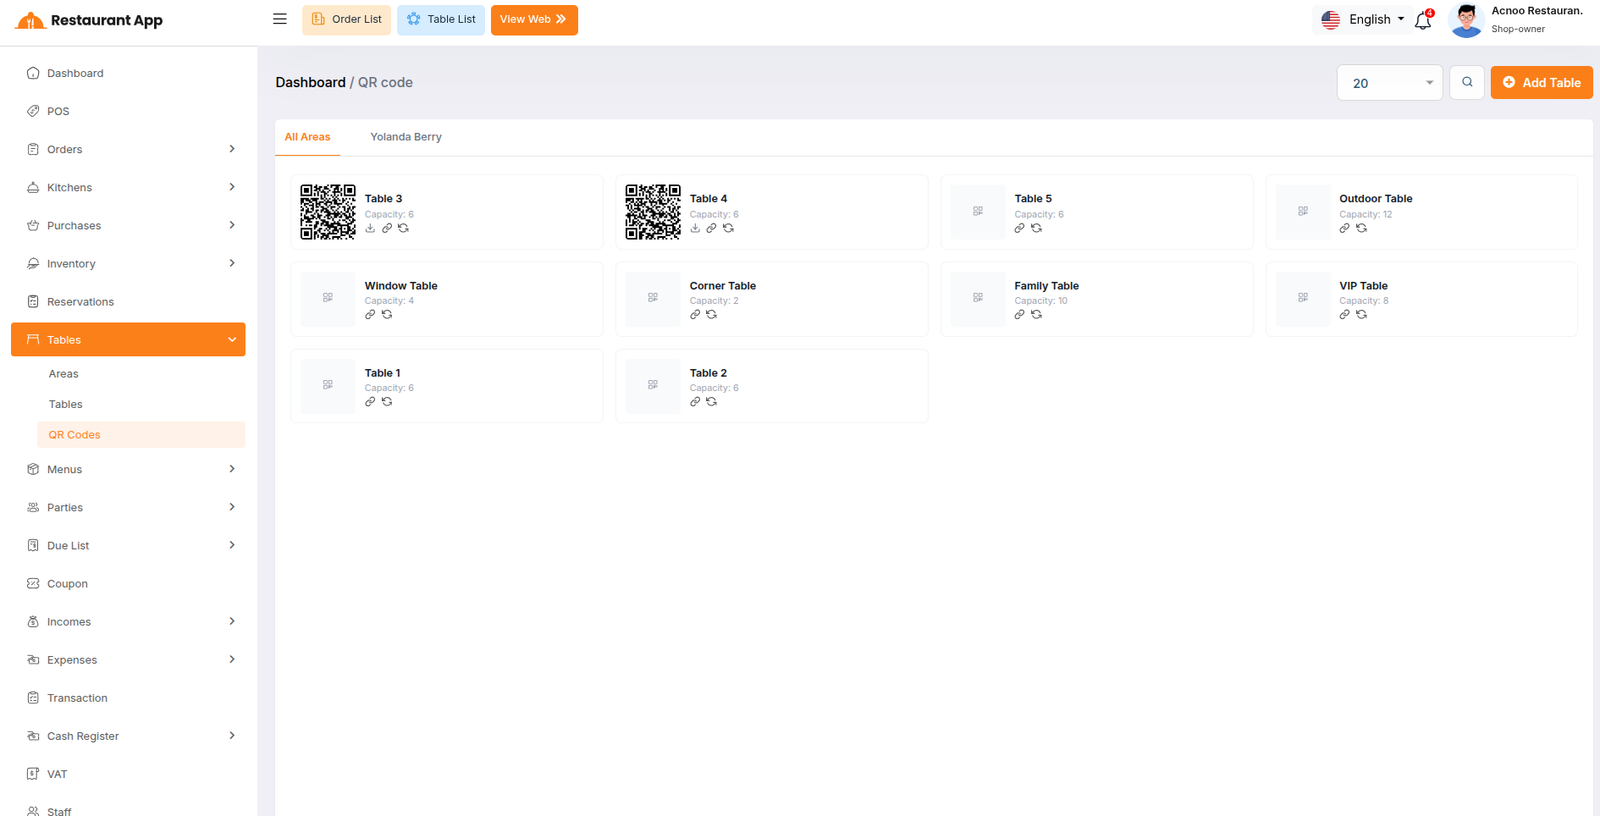
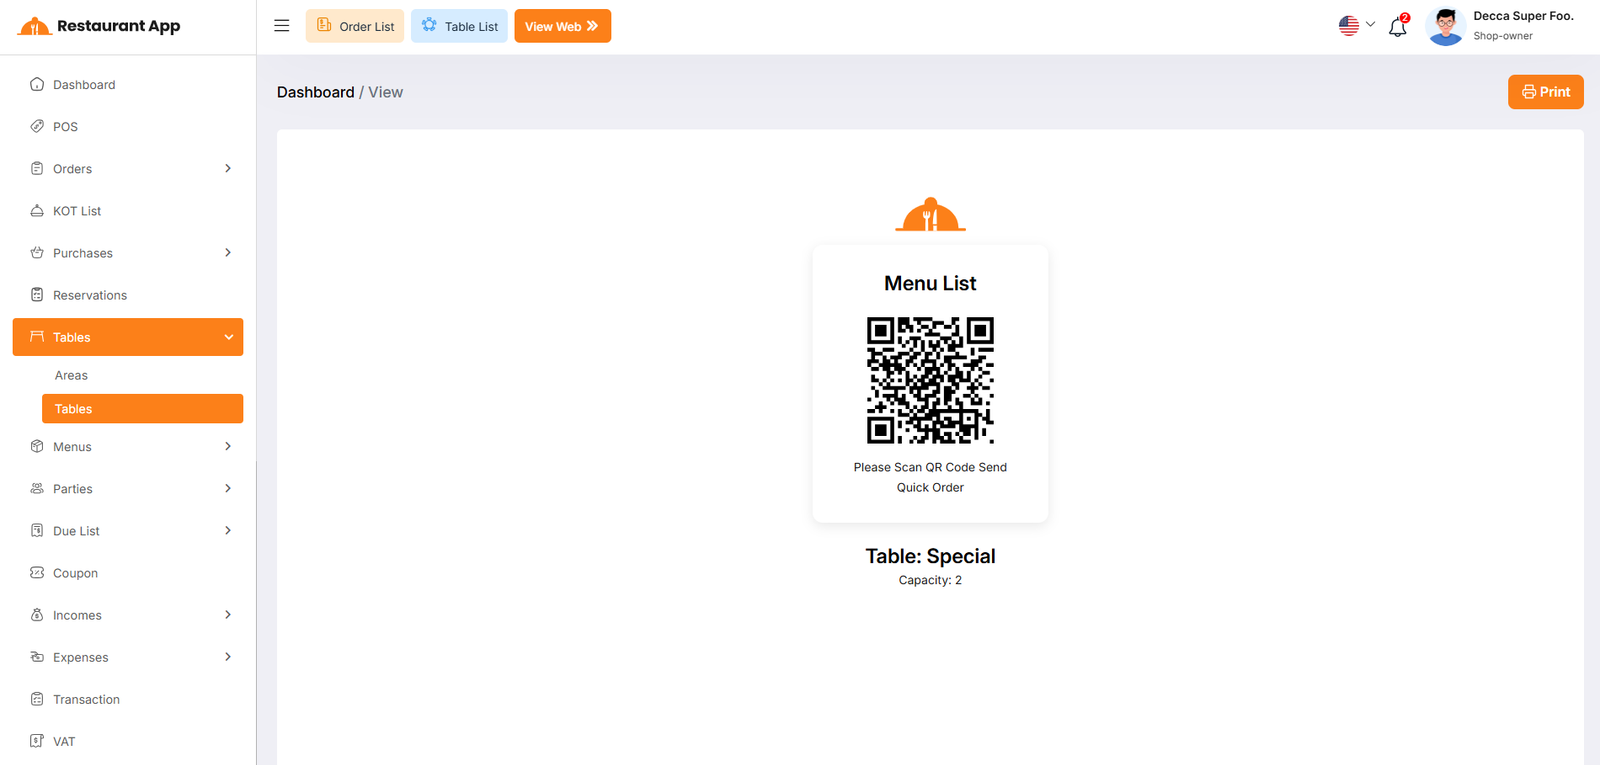
The QR Codes page is a separate view under the Tables menu. It lists every table with its scannable QR code so guests can open the digital menu and place orders directly.
QR Card Details
- Generated QR image (or a placeholder if not yet created).
- Table name and capacity.
Actions
- Download — Saves the QR code as a branded PDF.
- View — Opens the public table ordering URL in a new tab.
- Re-Generate — Creates a fresh QR code for the table.
Filtering — Search by name or capacity, switch between area tabs, and set per-page count.