Settings
In the Setting section, you have the capability to configure the fundamental aspects or core elements of this project.
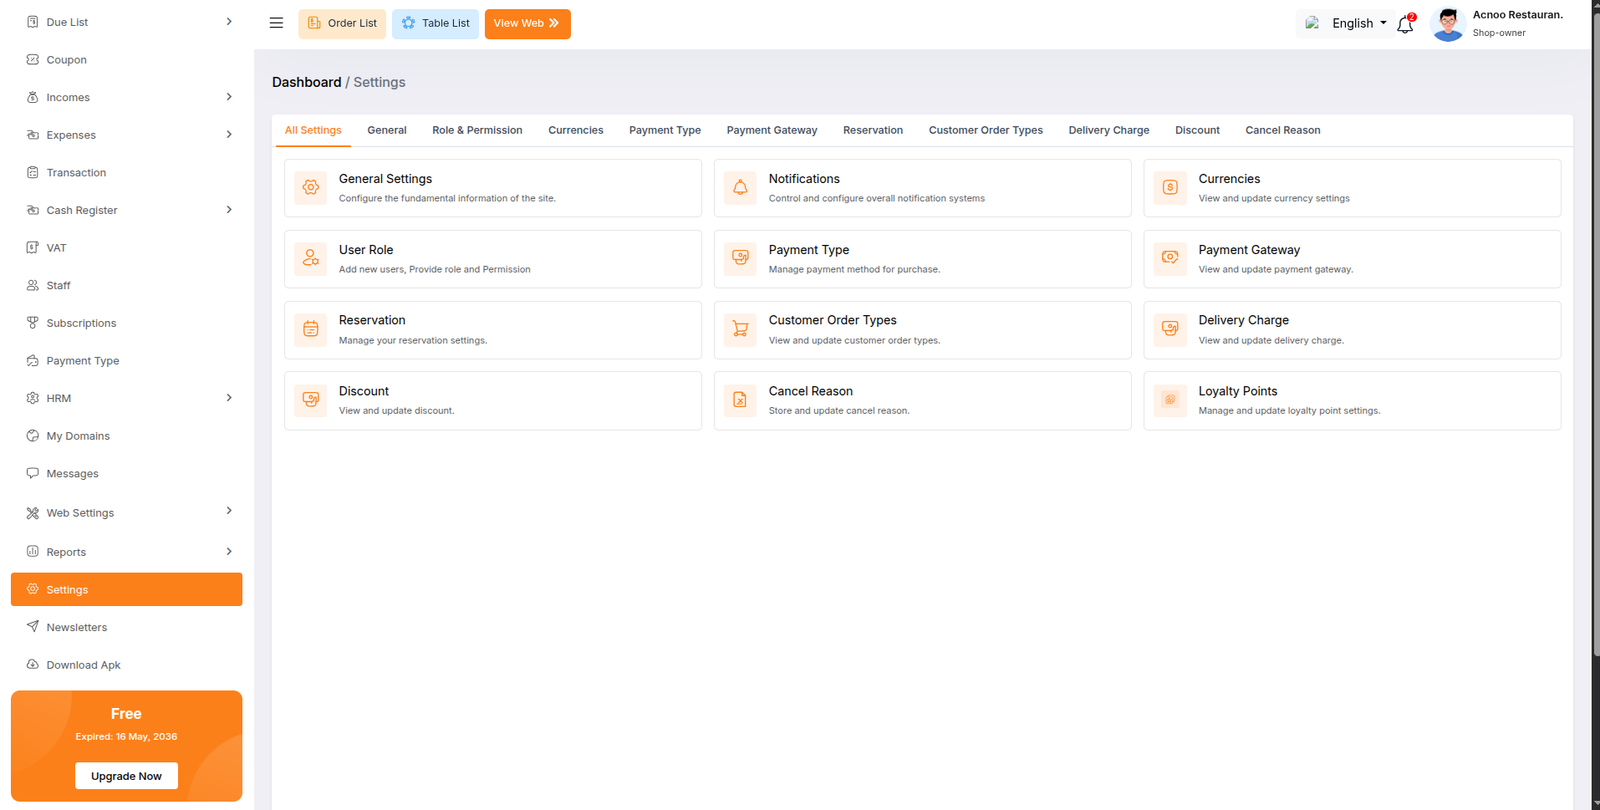
Generale Settings
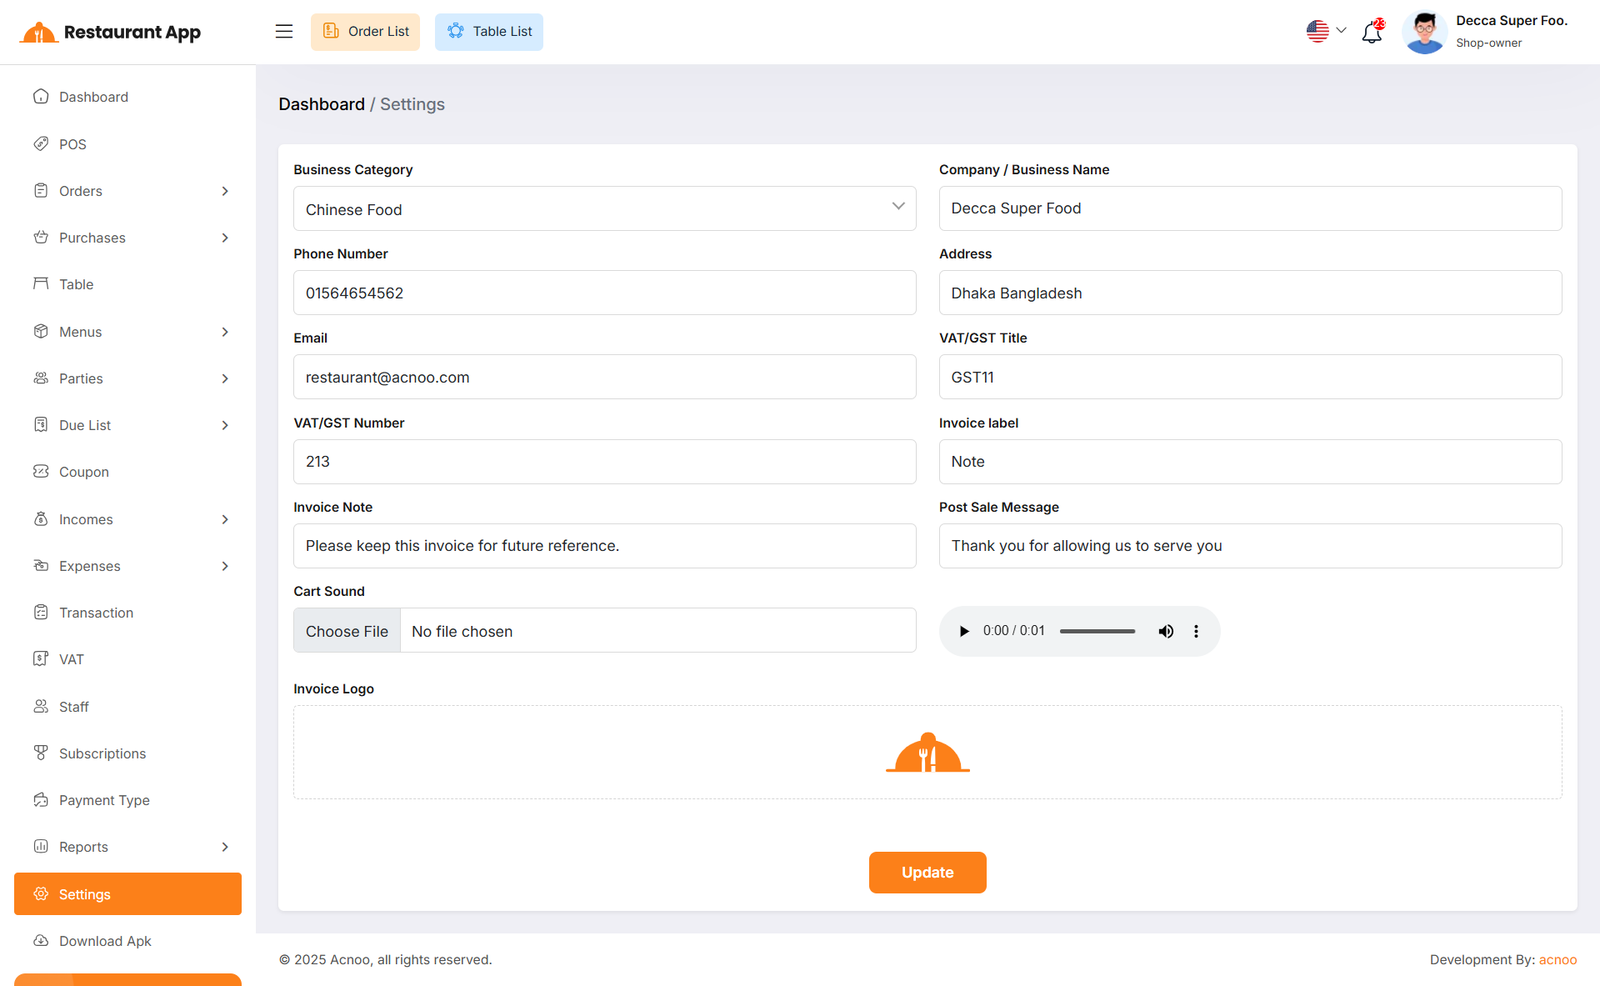
You can modify the general project information, which will also reflect in all your project invoices. For example, if you update the invoice logo here, it will be displayed on all invoices, including Sales, Purchases, and Due Invoices.
User Role
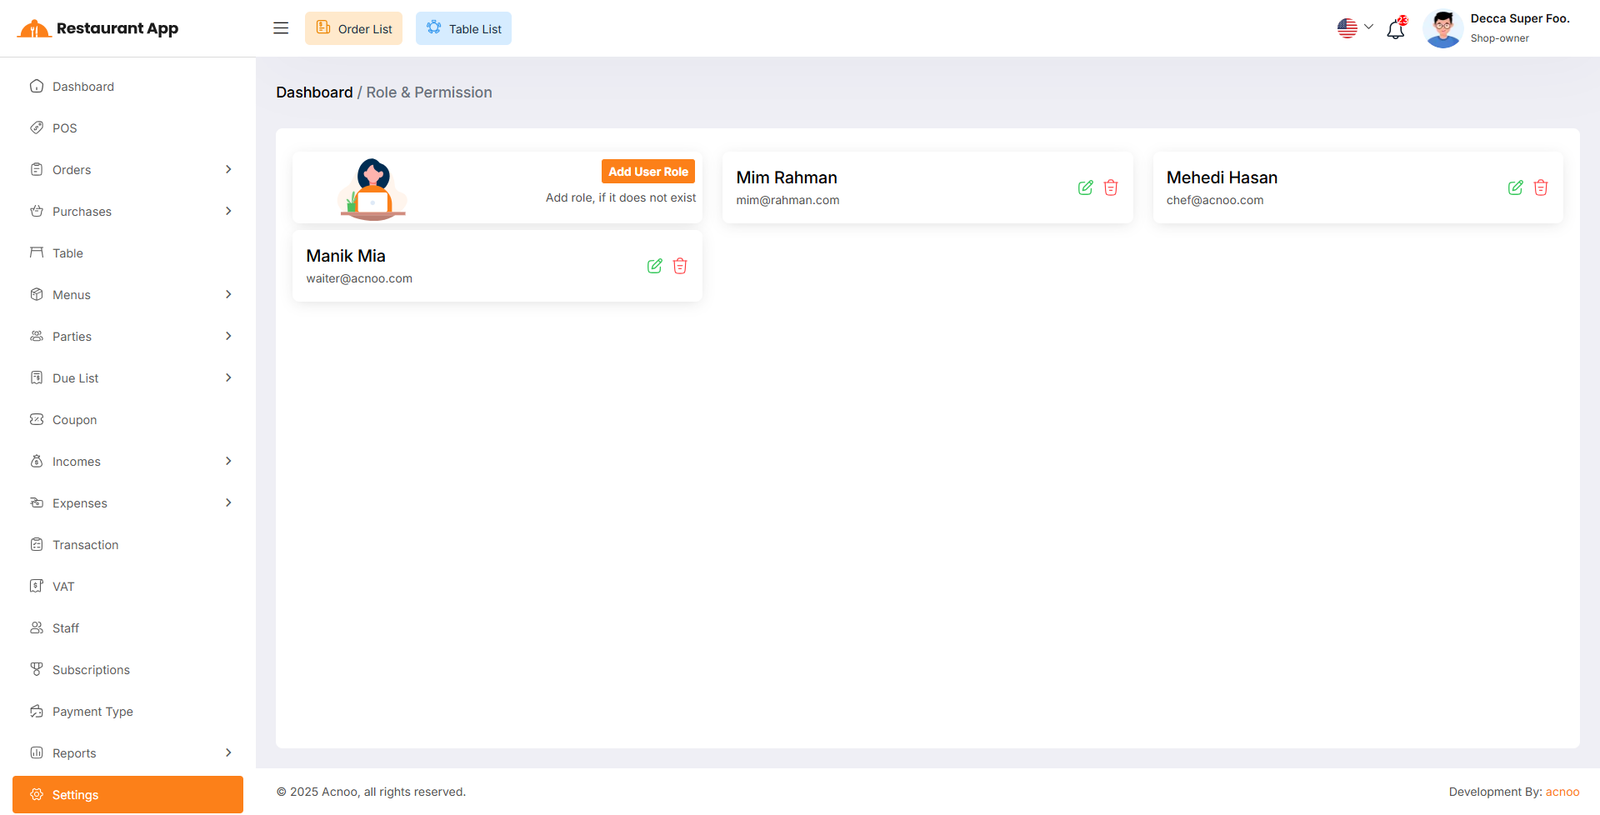
In this section, you can create new roles, update existing ones, and delete them. While updating roles, you can configure specific permissions to grant or restrict access to various features and functionalities. This enables you to customize user roles according to your organizational needs and security requirements.
Example Usages
Step 1: Add Staff Member and Assign Designation
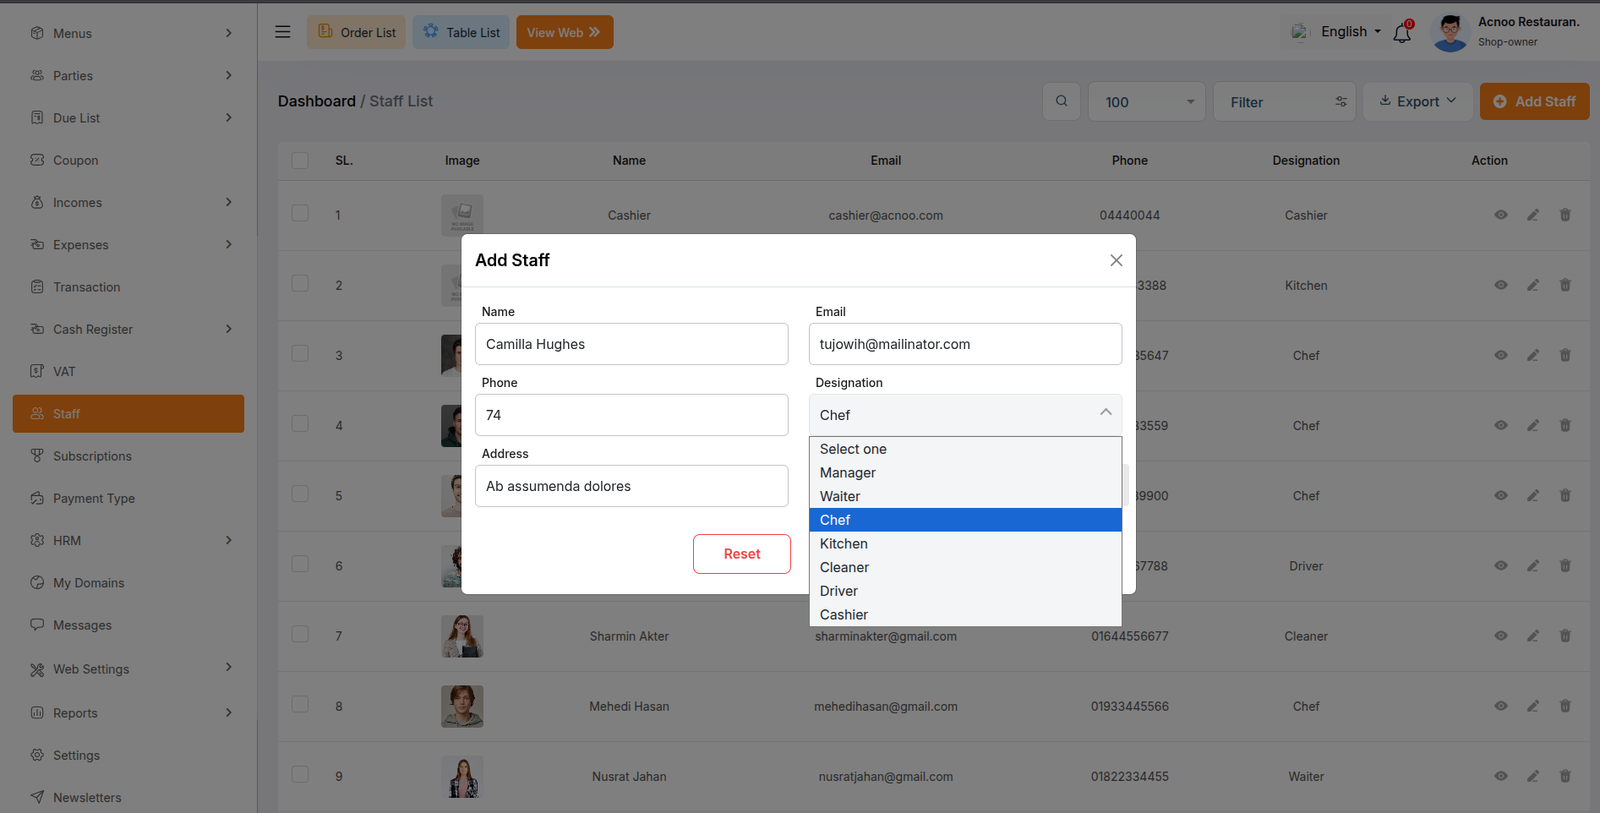
Before creating a user role, the individual must first be added to the staff list with the correct designation (Chef or Kitchen).
- Navigate to the Staff section from the left-hand sidebar menu.
- Click on the Add Staff button located at the top right corner of the dashboard.
- Fill out the required staff details in the modal form:
- Name: Enter the staff member's full name (e.g., Camilla Hughes).
- Email: Provide a valid email address.
- Phone: Enter the contact number.
- Address: Input the physical address.
- Designation: Click the dropdown menu and select either Chef or Kitchen based on their role.
- Save the entry to register the staff member.
Step 2: Navigate to Role & Permission Settings
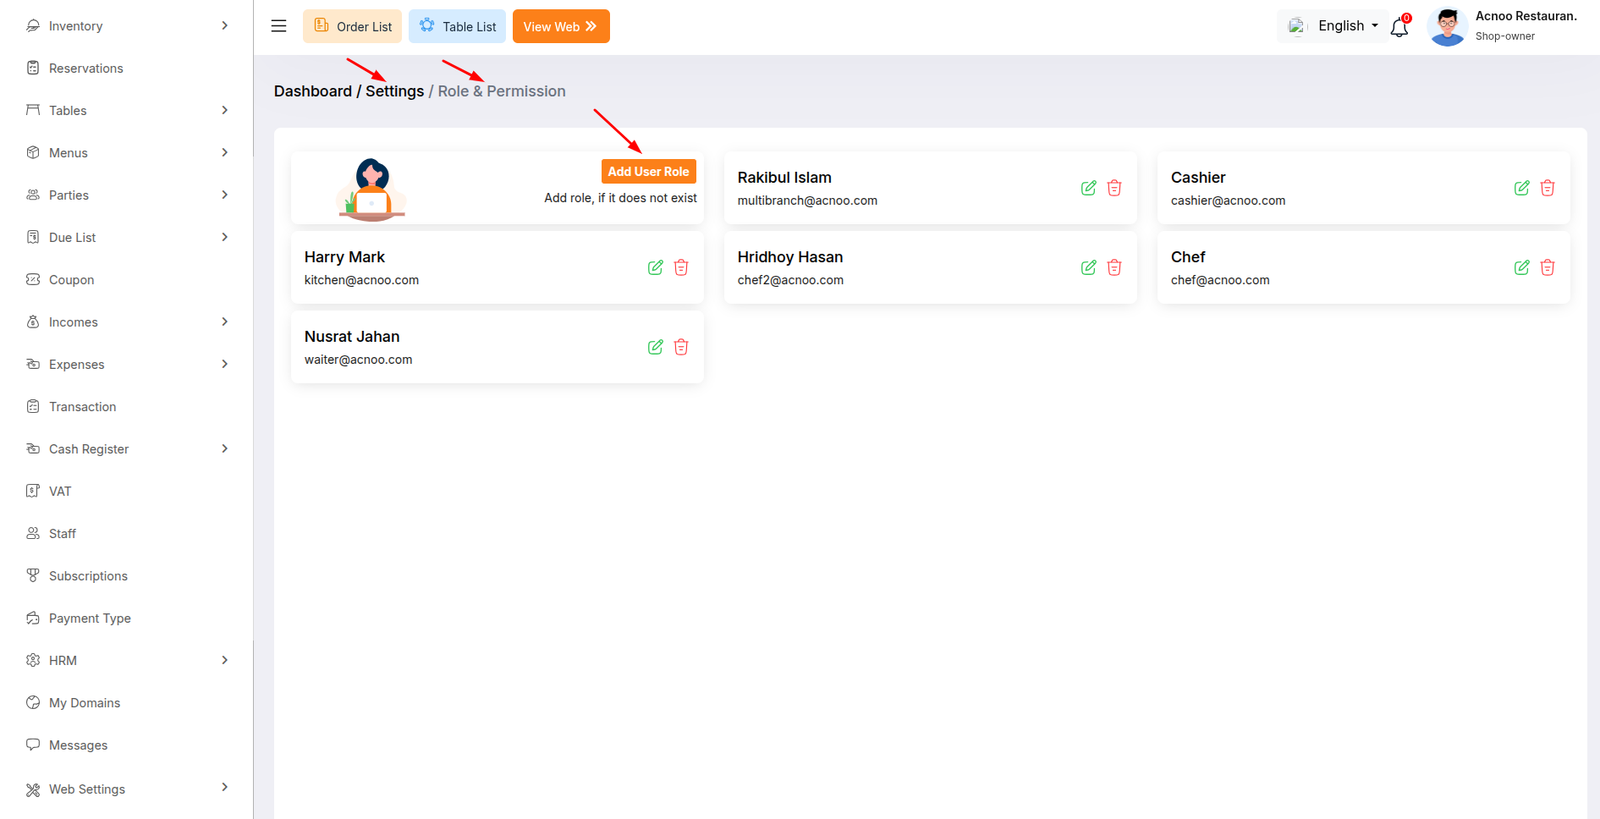
Once the staff member is created, proceed to the Role & Permission settings page.
- Locate and click on Settings in the main sidebar, then select Role & Permission.
- You will be directed to the
Dashboard / Settings / Role & Permissionmanagement screen. - Click on the Add User Role button to open the role creation interface.
Step 3: Configure Login Credentials and Permissions
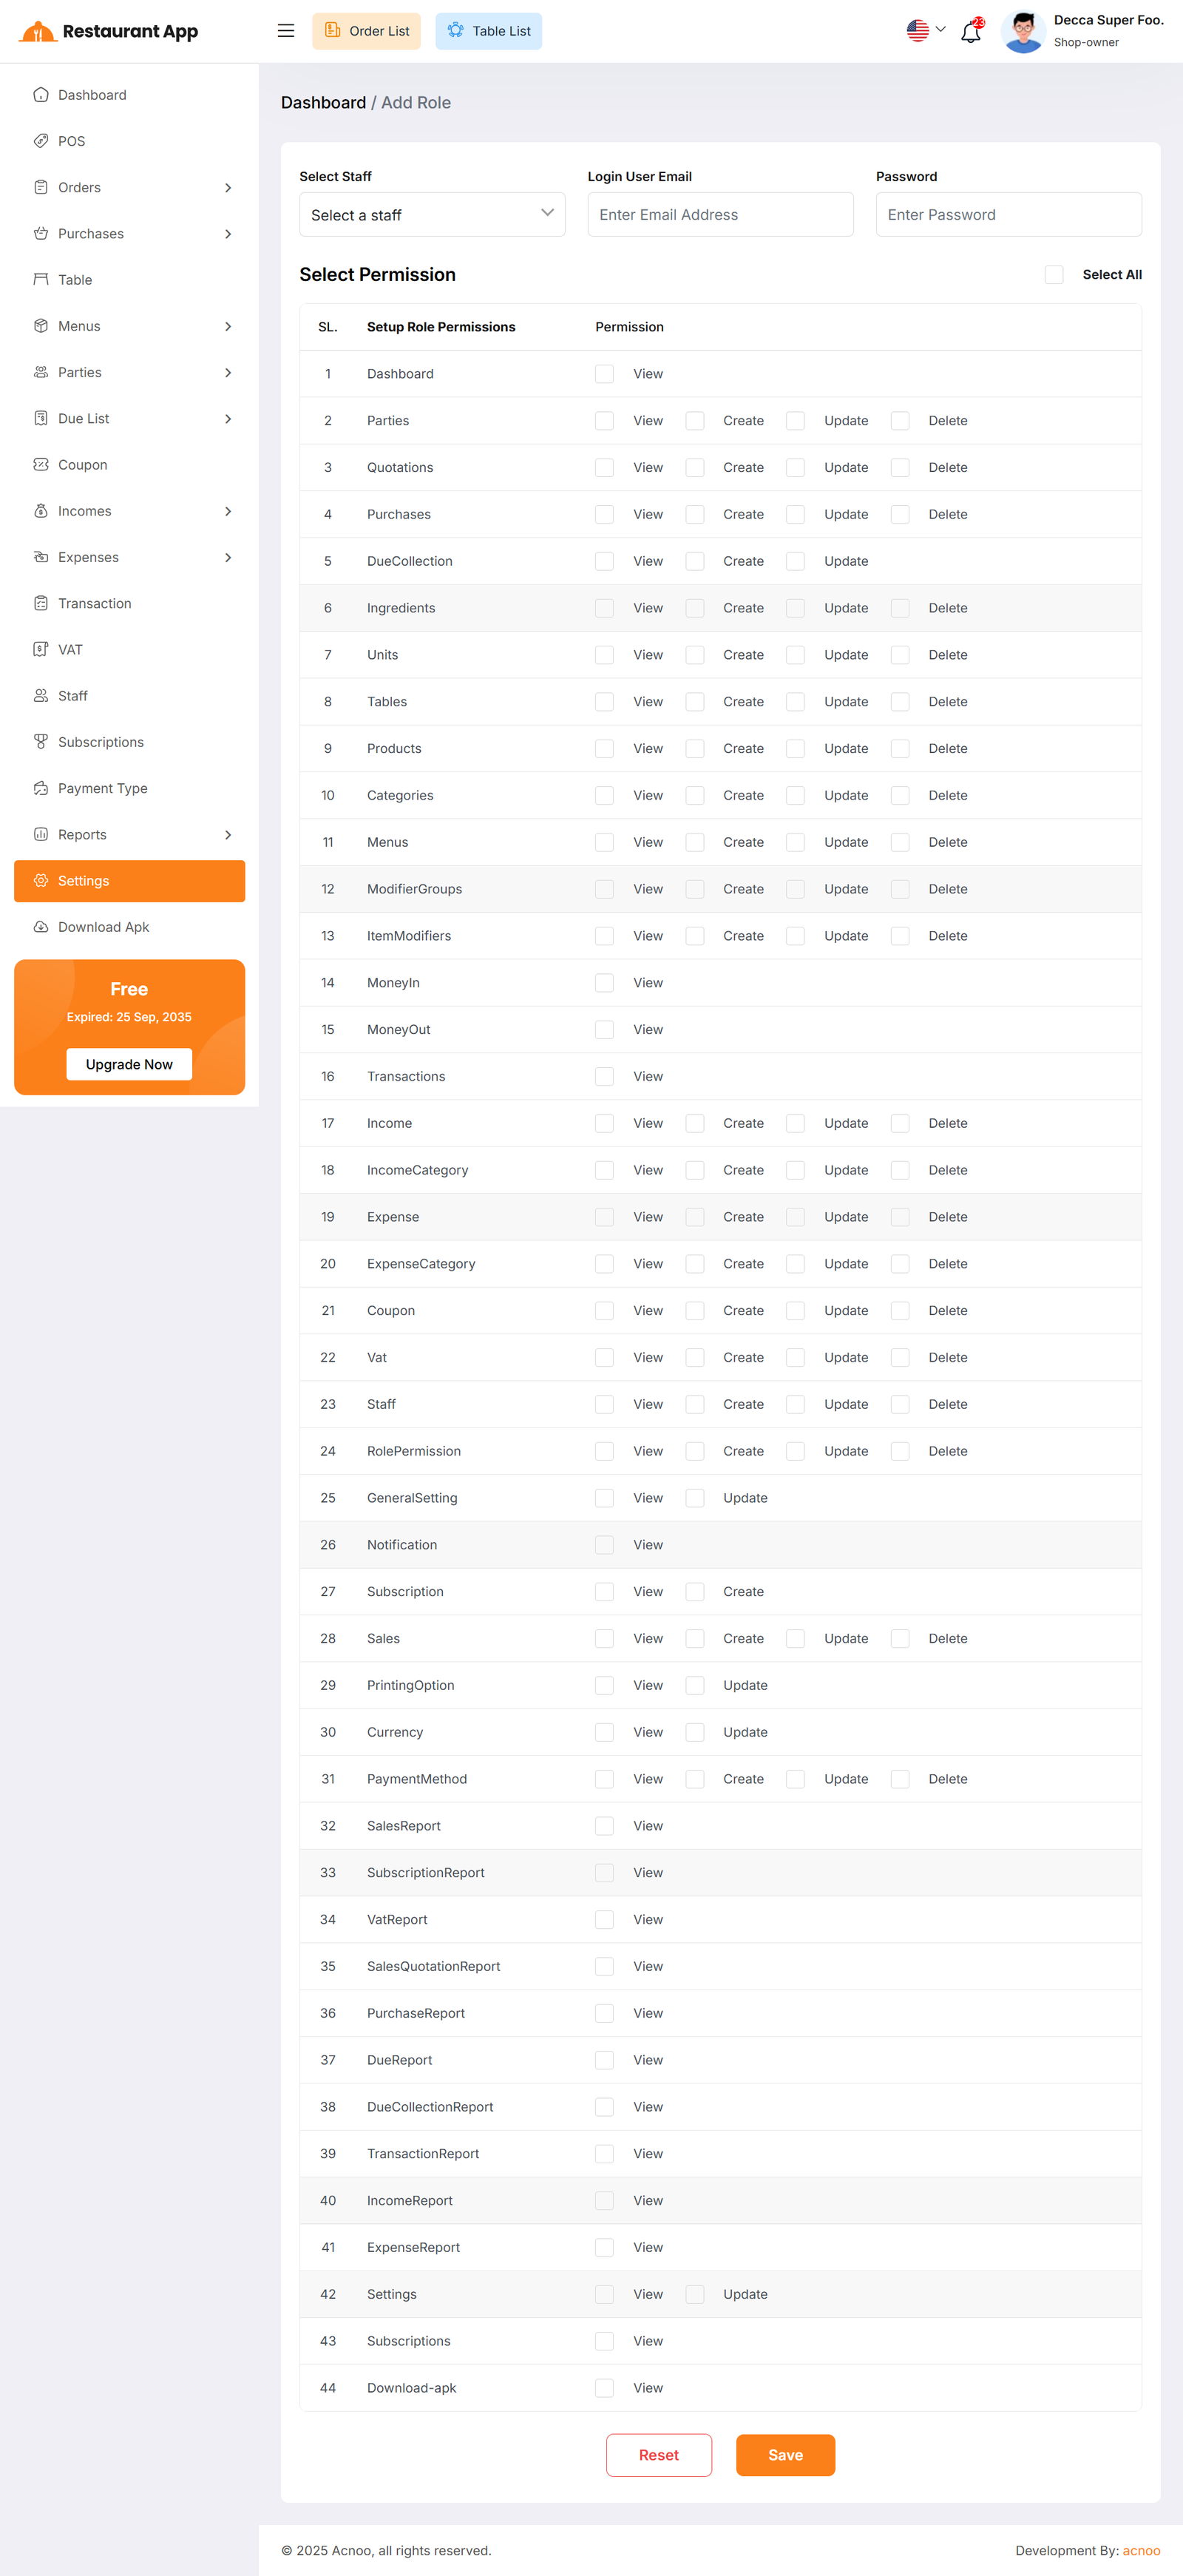
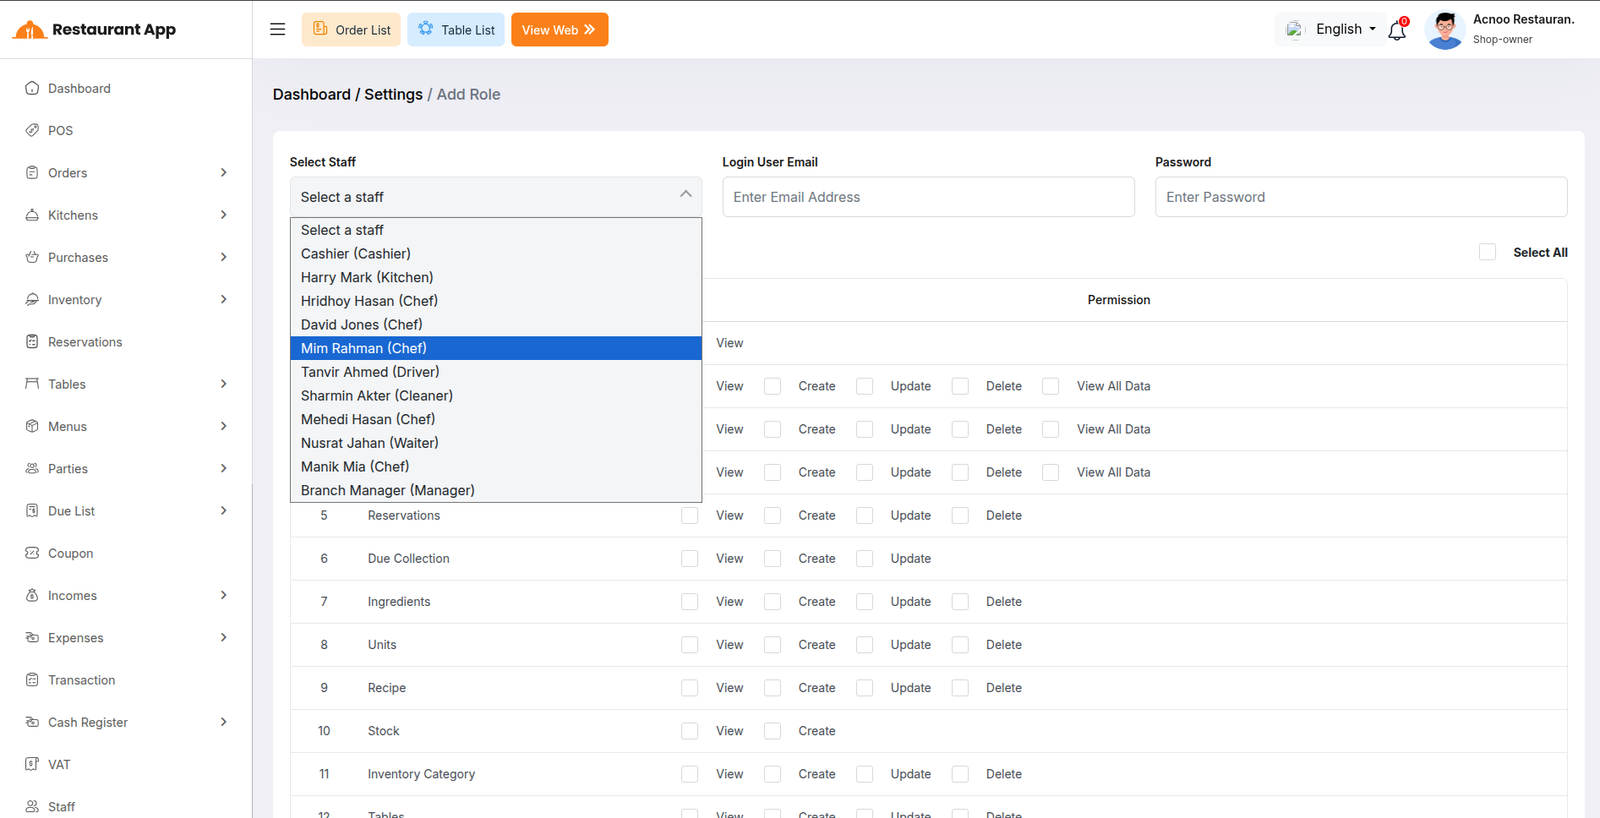
After clicking "Add User Role", you will land on the Dashboard / Settings / Add Role page where you can map the newly created staff member to login parameters.
- Select Staff: Click the Select Staff dropdown menu to view the list of registered personnel. Choose the specific staff member you added in Step 1 (e.g., a staff member designated as Chef or Kitchen, such as Mim Rahman (Chef) or Harry Mark (Kitchen)).
- Login User Email: Input the designated login email address in the Enter Email Address field.
- Password: Enter a secure password in the Enter Password field for system access.
- Permissions: Configure module-specific permissions (such as
View,Create,Update,Delete, orView All Data) by checking the appropriate boxes corresponding to the user's operational needs. You can also toggle Select All if full permissions are required. - Save the configuration to finalize creating the user role for the chef or kitchen staff member.
Note
The same process must be applied for other roles and permissions, such as waiter and cashier.